Some thoughts on the K5BCQ Si570 signal source

For the last few months, I’ve been working on building a radio from a pair of kits old enough to vote: KK7B’s R2 receiver and T2 transmitter. A complete transceiver built from these kits needs some other pieces, including a VFO (variable frequency oscillator). After looking around a bit, I picked an Si570 signal source kit from Kees Talen K5BCQ and John Fisher K5JHF.
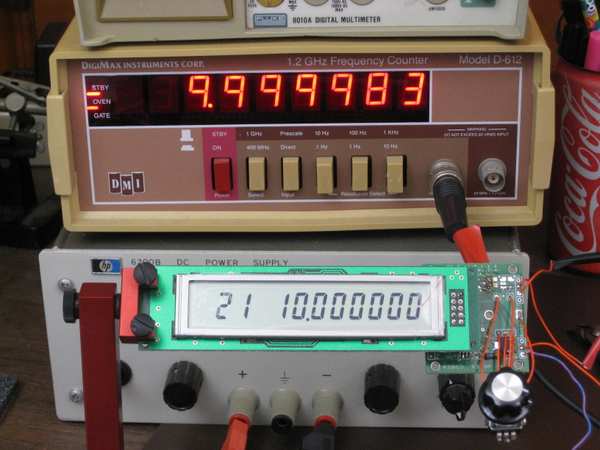
Si570 signal source and frequency counter, showing 17 Hz difference at 10 MHz

I’m not going to try to review the kit, because Jack Smith wrote the canonical review of it already. Instead, I will share some impressions of the kit.

First off, the PCB layout has not gotten better. There are some crazy things about it, including through-hole parts mounted on opposite sides of the board, such that one component prevents access to the terminals for another. The layout of the output circuit is also odd. In an effort to provide for many different output options, apparently while keeping trace lengths to a minimum, the output section is crowded and hard to navigate.

I had to do only a little debugging after assembly. The first problem was that the two pads at the ends of the Si570 were not well-soldered. Jack Smith ran into the same problem. My second problem was a little more subtle. I fired up the circuit and saw output at the right frequency, but 0.5 V in amplitude. I purchased the CMOS output option, so it should have been a 3.3 V square wave. Tracing out the circuit, I found that the signal was getting knocked down when it passed through a DC blocking capacitor. Oddly enough, I noticed that when my ‘scope probe pushed down on the right spot on the capacitor, the output jumped up to 3.3 V. I probably fractured the cap with the heat of soldering. I had changed my mind about capacitive coupling anyway, so I replaced the cap with a 0 ohm resistor and now I get the output I expect.
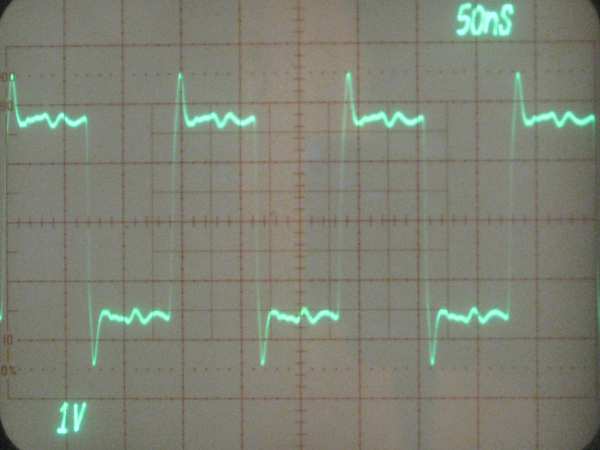
Waveform from the Si570 VFO

The ‘scope shot shows the output, which is a reasonably clean 3.3 V CMOS signal. There is almost a volt of overshoot on the transitions, which is a little concerning, but I am not too worried about it at this point. The CMOS edges are fast, making overshoot understandable, and the size of the overshoot is likely to change as the VFO is integrated into the radio. I will worry about it later.

All in all, I have to say that the board works a treat. It is awesome to see 1 Hz tuning resolution and crystal oscillator stability coming out of a tiny 8-pin surface-mount part. I measured the frequency as being off by about 14 to 17 Hz at 10 MHz, which works out to about 1.7 ppm. Drift is confined to that 3 Hz range, at least when sitting on my basement workbench. The board does have a provision to calibrate out the frequency error, which I have not used yet. This much error really doesn’t matter.

The microcontroller firmware with the kit works well. The user interface is slightly unusual, with a decimal point used as an input cursor, but it works fine in practice. I do wish there was a way to configure band limits. The board has provisions for band selection, with up to eight bands possible. However, regardless of the band selection, the device will tune over its entire range. In a multi-band radio that is a poor idea, because it would be too easy to transmit at the wrong frequency and damage the final amplifier. With hundreds of on-board memories (100 per band, minus 20 reserved for setup), it would be nice if a few configuration memories were used to choose tuning limits for each band.

Over all I am happy with the board. It will serve just fine as my VFO.
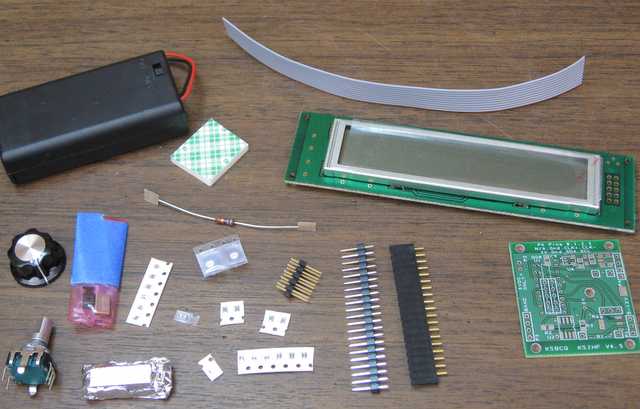
An Si570 VFO for the R2/T2 transceiver project

I’m continuing to work on my R2/T2 transceiver project as time allows. My goal is to get on the air before the sunspot cycle peak passes. That gives me a little time yet, but at the rate I get things built around here, it’s going to be a close race.

Even when building a radio from kits, as I am here, there are many decisions to be made. When I bought the KK7B R2 and T2 kits, I had no thoughts about what to use for a local oscillator. Technology has advanced mightily since then, and now I have the option of an Si570 frequency synthesizer. This little chip provides a precise, low-noise  digital clock at programmable frequencies between 3.5 MHz and 1.4 GHz, depending on the variant one buys.

After looking around a bit, I picked John Fisher K5JHF and Kees Talen K5BCQ’s SI570 controller/frequency generator kit. Once it arrived, I had trouble figuring out how to fit it into my case. This case has a 0.125″ thick aluminum front panel. The threaded bushing on the kit’s encoder/switch was not long enough for this thick panel and a mounting nut, let alone a washer. There were also some mechanical things I didn’t like about the circuit board. I thought a bit about designing a new board for the parts from the kit, but I decided I could fix the worst of the problems with a new encoder. A little browsing at Mouser turned up an extremely similar model that had the longer bushing I needed. It even has the same footprint.

I’m a little stumped by how similar they are. The Mouser one (on the right) is from Bourns, but looking over the data sheet, I couldn’t find a model with a bushing and shaft length matching the one from the kit. The body of both units is essentially identical. Hopefully they are electrically close enough, too. I had to guess at how many pulses per rotation it should have.

I’m still chewing on another mechanical question. The kit is designed to have the PCB soldered to one end of the LCD, with the encoder mounted off the PCB, on the right of the LCD. I want to have the tuning knob centered below the LCD, so the PCB is going to have to stay with either the LCB or the encoder, and the other will have to be connected with wires. My initial thought was to mount the encoder on the PCB and wire the LCD remotely, but I’m beginning to favor mounting the PCB on the LCD and running wires to the encoder. The connection between the PCB and LCD will involve high-frequency digital signals, while the connection to the encoder is analog switch closures that have less potential for RF interference. It would be better to have the LCD signals cover a shorter distance so they radiate less.

On top of that, putting the PCB and the LCD together will make it easier to surround them with a shield.

All this rambling aside, yes, I’m making slow progress on the R2/T2 rig. When I’m working on a project, sometimes I spend a lot of time doing and other times I spend my time thinking. I’m a little out of my element with the mechanical design of the radio, so lately I’ve been planning the design carefully.

Going Forth, or maybe not.

Over the years, I keep coming back to the Forth programming language. I admire its lean design and very efficient use of resources, but oh, is it ever quirky. My most recent return was motivated by James Bowman’s J1 Forth CPU, a small but blazingly fast FPGA-based processor.

My ambivalence with Forth started back in the 1980’s, when an engineer named Tom Harsch mentored a very young me in digital electronics and computer architecture. Tom is an all-around engineer, versed in both hardware and software. He had a fondness for Forth, and he introduced it to me. Or perhaps I should say

ME FORTH TOM INTRODUCED

You see, the very first quirk one runs into when encountering Forth is its use of postfix notation to represent operations. While mainstream languages like BASIC and C would have syntax resembling this,

print 2 + 3

Or this,

printf(“%d\n”, 2 + 3);

Forth, in common with German, likes its verbs last. Here’s the Forth version:

2 3 + .

Don’t overlook that period, “.”, at the end. In Forth, that does not end a sentence; it is the command for printing a number.

Postfix notation is intellectually appealing, for several reasons. In postfix, every operation can be expressed with the same basic syntax, so there is no longer a need to distinguish between infix operators (+, -, *, etc.), unary prefix operators (like negation, -), and function calls. They all fit the same basic syntactic framework. Another advantage is that it maps very simply onto a stack-based processor model, which in turn can be implemented reasonably efficiently on many traditional CPUs or which really flies on dedicated hardware.

Forth uses postfix notation to permit the implementation of a simple compiler, which is usually built right into the run-time environment. The simplicity of the compiler results in further bizarre constructs, like the IF…ELSE…THEN statement. Not only are “ELSE” and “THEN” ordered backwards from pretty much every other language in the world, thanks to postfix notation, the “THEN” keyword comes after the code for the ELSE:

( condition ) IF ( then-actions ) ELSE ( else-actions ) THEN

On the bright side, this did give rise to a classic bumper sticker from the Forth Interest Group:

FORTH LOVE IF HONK THEN

Defining a function is straightforward, if you don’t mind punctuation:

: 2times 2 * ;

The colon (:) command defines a new “word” for the language. The next text, “2times”, is the name of the new word. That is followed by the instructions for the word and a semicolon (;) that ends the definition.

So what does this new word do? It multiplies whatever number came before it by 2. “5 2times .” is equivalent to “5 2 * .” and prints the number 10.

This syntax is admirably compact and naturally lends itself to a functional style. On the other hand, what is the name of the word doing after the colon?  In a postfix language, I would expect to quote the name and the function body, then use the defining word. Something like this:

‘2times (2 *) :

Flip that around and add a “lambda” and it starts to look like LISP, but that’s a subject for another time. In Forth, this kind of quirkiness, where everything is postfix except for the parts that aren’t, is standard. It keeps Forth’s compiler simple, but at a cost in elegance.

Syntactic quirkiness aside, Forth has a  few things going for it. First, it makes extremely efficient use of machine resources. A reasonable Forth environment can fit in 4K of RAM and include a compiler, an interpreter, and room for a small application. A full-featured environment is larger, but still takes less resources than equivalent functionality in other languages. Forth is generally fairly speedy, too.

Forth is extremely versatile. The compiler is implemented in an extensible way. You can define Forth words that alter how the compiler works, giving another way to work at higher levels of abstraction.

The philosophy behind Forth encourages programs to be organized in a hierarchy of small, simple functions. Each layer of functions builds a higher level of abstraction than the one that lies below it. I like this kind of well-factored programming, and it would be nice to work in a language that encourages it.

That brings me to the J1 Forth CPU. This compact Verilog core is a work of brilliance, particularly in the way it uses the FPGA’s dual-port RAM in a carefully designed data path to achieve a high instruction rate. The instruction set architecture is pretty much pure Forth, and the implementation was written to be fast. James Bowman’s paper on the J1 (pdf) is well worth a read, and so is the Verilog source code.

Ever since I read the J1 paper, I’ve been itching to find a use for it. (Yes, I know, that’s a solution in search of a problem…) My oft-delayed R2/T2 transceiver project offered a chance. As I thought about what to put on the front panel, my mind strayed to thoughts of touch-panel LCDs. Wouldn’t it be nice to be able to defer most of the user interface decisions to software? It’s much easier to move a button on a screen than to un-drill a hole. eBay has a number of nice touch panels that would fit my chosen case perfectly.

Besides, I’ve been getting in a bit of a rut lately. Though there was a time when I learned every language I could find, lately I’ve been using C almost all the time. How better to shake things up than by implementing a touch-screen user interface in Forth?  My favorite way to learn a new language is to dive into a major project. In fact, I learned C by writing a text editor. Next I learned C++ by writing two text editors. Then I learned Tcl by writing a text editor, and Prolog by writing tax software. (Go figure.)

Eventually I came to my senses. First off, I’m so busy these days that I’m finding it hard to spend any time on the R2/T2, let alone write graphics software for it. A more serious problem, though, is that the Actel FPGA I have handy has only 6K of RAM and limited capability for ROM or flash. To do the graphical user interface, I would want fonts in two sizes, and the J1 on this FPGA would not be able to store even one. I was brainstorming ways to extend the J1’s address space into off-FPGA storage when I had my Arduino epiphany. It does not make sense to spend time engineering complex font storage when a cheap, off-the-shelf processor has 32K of flash and the gcc C compiler at the ready.

Even with the Arduino standing by, I can’t get avoid being busy. No, the R2/T2 will have to make do with switches and knobs. Maybe in the future I can replace them with a touchscreen.

That settled, only one problem remains: I no longer have a problem for the J1 and Forth to solve.

Oh, well…

Updated 1/18/13 to correct the IF…ELSE…THEN syntax.

An enclosure for the R2/T2 transceiver

After months of organizing parts, I have finally gotten back to the R2/T2 transceiver project. Don’t get me wrong, the cleaning and sorting is not done, but I felt the urge to do something a bit more… constructive.

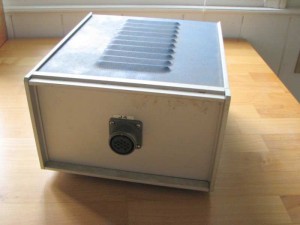
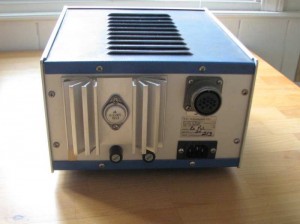
While cleaning, I found a box of old electronics junk that had promising cases. Electronics enclosures are expensive. Salvage can be a good way to keep the cost down. I don’t know what this thing once was, but there are military-style circular connectors on the front and back, two fuse holders, a power inlet, and no visible controls.


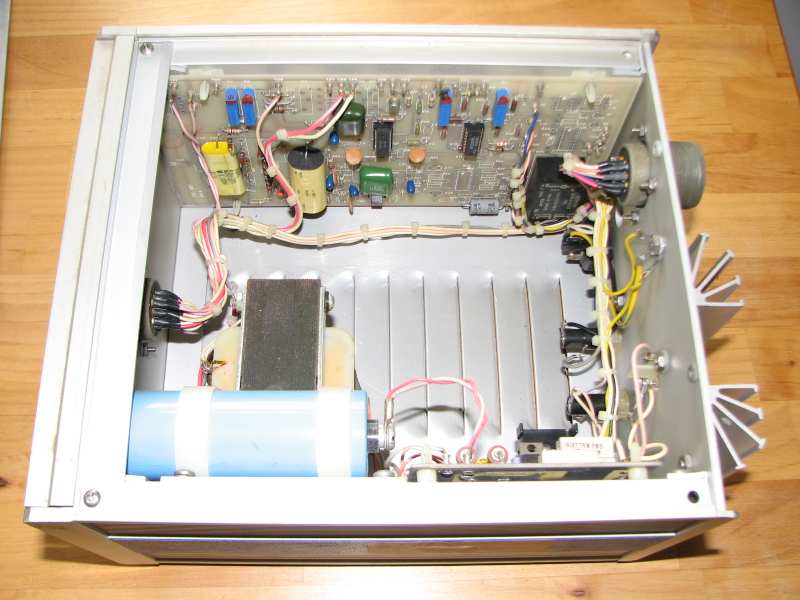
Opening it up, I found this:

There’s a lot of empty space in there! It looks like it was some kind of power supply. Next to the weighty transformer and big blue filter cap, a circuit board carried 7805 and 7806 regulators, several current-sense resistors and an LM324 quad op amp. It also had a power transistor on board and connected to the big TO-3 transistor on the heat sink in the back.

The board on the other side had a couple of high-voltage film capacitors, some ten-turn pots with their positions set with nail polish, two LM324’s and one RCA 4151 voltage-to-frequency/frequency-to-voltage converter. Down in the lower-right corner, it also held a solid-state relay. I’m a little more stumped about what this board was for. Maybe it was more power-supply logic, or maybe some kind of controller.

Tracing out the wiring harness revealed that 120VAC is run to the front connector, with only a fuse between the connector and the power cord. That could get exciting quickly to anyone not expecting it.

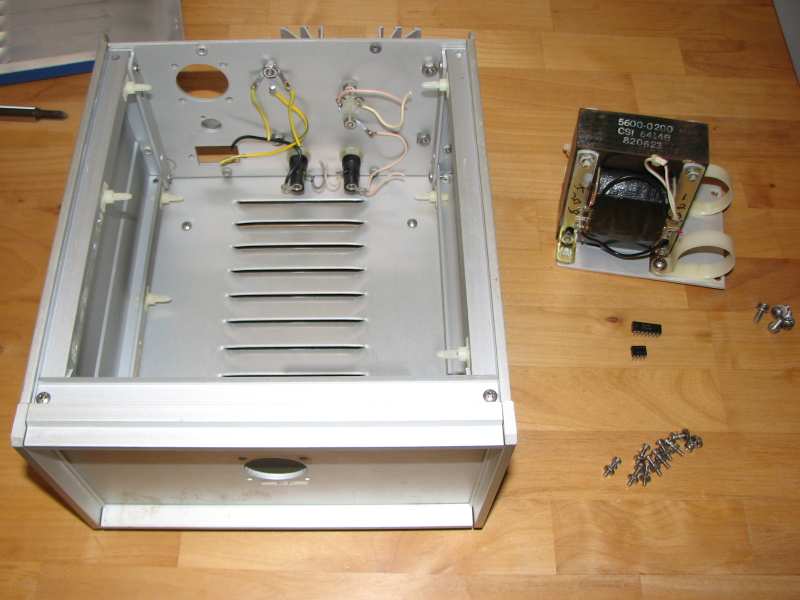
I pulled apart the whole thing, salvaging only the transformer, two ICs, and some fasteners. I tried to salvage all the ICs, but some were corroded into their sockets and could not be extracted without breaking pins. I have not had that happen before.

That’s the final product. I left the fuse holders, the heat sink, and a common ground point in place. They might be useful when this box becomes a transceiver. The front and back panel are 0.125″ aluminum and slide out after a few screws are removed. It will be easy to replace them with new panels for the radio.

The only fixed surfaces in this box on which to mount things are a pair of narrow rails on each of the side extrusions. The bottom is removeable and isn’t set up well to hold circuit boards. I will have to either add a false bottom or come up with a way to mounting the boards at right angles from the sides. Putting the boards flat on the sides, like the original residents of this box, won’t give me enough room, and because the boards are not sized to fit the walls, I would have to improvise some kind of mounting panel or angled standoffs to hold them anyway.

In any event, that problem is solvable. It’s a nice case for what I hope will be a nice radio.

KK7B R2 receiver: lifted pads, a scorched board, and it works anyway

I’m slowly making progress on my KK7B R2/T2 transceiver project. At my last report, I was waiting for replacement capacitors to arrive. They did, and I pulled out my ancient solder-removal iron, a Radio Shack unit from who knows how long ago.

Either my unsoldering skills are rusty or I was too impatient, or both. I managed to lift four pads, completely demolishing one. The other three were salvageable. I’d like the board to be perfect, but having it work is an acceptable substitute.

The new caps went in easily, with only a little fiddling to wire around the ruined pad. Better yet, the excessive bias current I saw before the replacement is gone! The board is supposed to be adjusted to 100 mA current. It used to start at 120 mA, with the bias adjustment set to its minimum, and drift its way up to more and more current from there (going as high as 200 mA before I’ve lost my nerve and switched it off). Now it starts at 84 mA and… drifts its way up from there to 130 mA and more.

OK, so one problem was solved. I can always increase current with the bias adjustment potentiometer.

After scratching my head a bit, I finally noticed one small sentence in KK7B’s articles on the R1 and R2. The audio output transistors need a heat sink, do they? Oops! I dug around a bit in my junk box but couldn’t find anything that would fit. The articles say the audio amp will drive a pair of headphones fine without the output transistors, so I decided to take them out.

I recently got a Sparkfun hot-air soldering station (a Sparkfun Free Day prize!) and thought I’d give it a shot. Sure, hot air is usually for surface-mount parts, but solder is solder, right?  Not being sure how to set the airflow and temperature settings, I set both on the high side, put some flux on the output transistors’ pads, and went for it. The result wasn’t pretty:

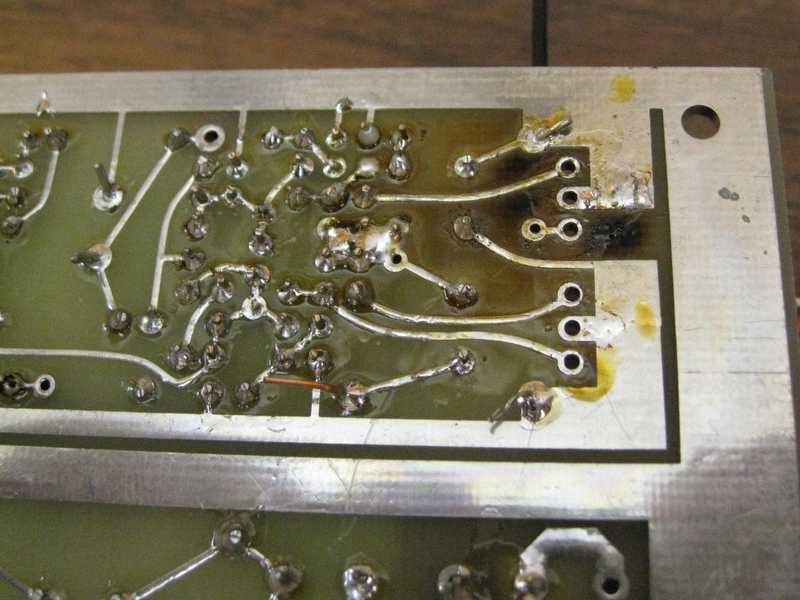
Oops... A scorched R2 PCB

Yes, I scorched the board. Oops. Between this and the lifted pads, I think I need to work on my unsoldering skills.

Since the transistors are 50 cent parts (TIP29/TIP30), I unsoldered them the easy way: I cut the leads, removed the leads from the board with my conventional iron, then cleaned out the holes with my solder sucker. I didn’t damage any pads this time!  (The picture above was taken after all of these steps.)

A little more soldering to hook up a BNC and some other goodies, and the board was alive!

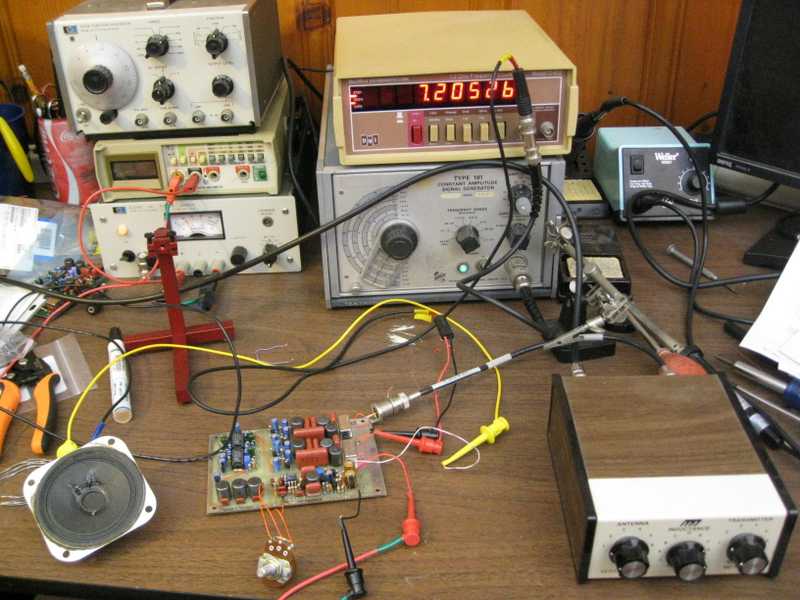
R2 on the bench, surrounded by test equipment

That’s a Tek 191 signal generator as the VFO (variable frequency oscillator), with a frequency counter as the readout. That’s an MFJ QRP antenna tuner in the foreground.

I didn’t build a phasing network yet, so I drove only one VFO input. That causes the R2 to function like a conventional direct-conversion receiver,receiving both sidebands simultaneously. That said, it works. I was able to hear signals, though frankly many were quite hard to copy. I’m not sure what else might be wrong.

The frequency counter spits out a lot of digital noise. I learned to flip it on only to spot-check my frequency. It’s a lot quieter in standby mode.

Did I mention that IT WORKS?

Despite the success, I’ve been struck by a bit of paralysis in moving forward. There are so many choices to make for integrating the radio.

  • What kind of VFO should I use? Should I design my own or buy a kit?
  • Which modes should I include?
  • How much power output do I want?
  • What power amp should I use? Should I design my own or buy a kit?
  • Which case should all of this go in?
  • What microphone, and microphone connector, should I plan for?

Keep in mind that this is supposed to me my fast route to getting on the air, so I’m thinking kits for both the VFO and amp. Besides, with as busy as it has been at work lately, it is nice to sit back and just build something.

It’s not a pretty project any more, but it works! Hooray!

R2 receiver update: Time for new electrolytic capacitors

Crunch time at work has been limiting my basement tinkering, but I recently found time to work on my R2 receiver a bit more. It is pulling excessive bias current, which had me scratching my head. The audio power amplifier bias is supposed to be adjusted so that the whole board pulls 100 mA, but it’s taking 120 mA even with the bias pot set to its minimum. After double-checking all of the component values and verifying all of the bias voltages on the board, I was left scratching my head. Then I remembered the age of the kit. Even while building it, I had doubts about the electrolytic capacitors…

This R2 kit includes 15 Panasonic Z-series electrolytic capacitors. Aluminum electrolytic caps are good at one thing: Lots of capacitance at a low cost. In nearly every regard, they have inferior performance, with high equivalent series resistance (ESR), inductance (ESL), and, yes, a short lifetime. I’m not sure exactly how to translate the lifetime specifications for electrolytics to room temperature storage, but the rule of thumb tends to be that they can tolerate 5 years on the shelf, after which they require a “reforming” procedure. Reforming them at that point can get them to last another 5 years or so. After that, figure that they are shot. Old electrolytic capacitors can have excessive leakage current. In extreme cases, this current is enough to heat them up excessively and they go bang! The capacitors on this board are old enough to vote. Maybe one or more of them are to blame for the extra milliamps.

I had a little trouble finding the perfect capacitors, but then I was looking for performance at least as good as the original. This was perhaps foolish, because I couldn’t find data on the Z-series caps. Panasonic discontinued them in 2000. In lieu of further information, I arbitrarily went for high-quality models from a favorite manufacturer. In some cases, these were nearly double the price of the cheapest options, a breathtaking 23 cents versus 12 cents, quantity one. Seriously, replacements for all of the caps cost all of $2.85, including a few spares for good measure.

My one mistake so far is to forget about the T2 transmitter. If the R2’s capacitors are bad, the T2’s surely are as well. Maybe the spares I bought will end up there.

Troubleshooting is half the fun of this stuff. Who needs sudoku when you can puzzle out a misbehaving circuit?

Building a KK7B R2 phasing receiver

Hi, I’m back! It was a rough week, with a death in the family. As it ended, I found some time for some “solder therapy”. There is something good for the soul in putting together electronics. I don’t know if it’s the scent of the rosin or the satisfaction of seeing a project come together. All I know is it’s good for me.

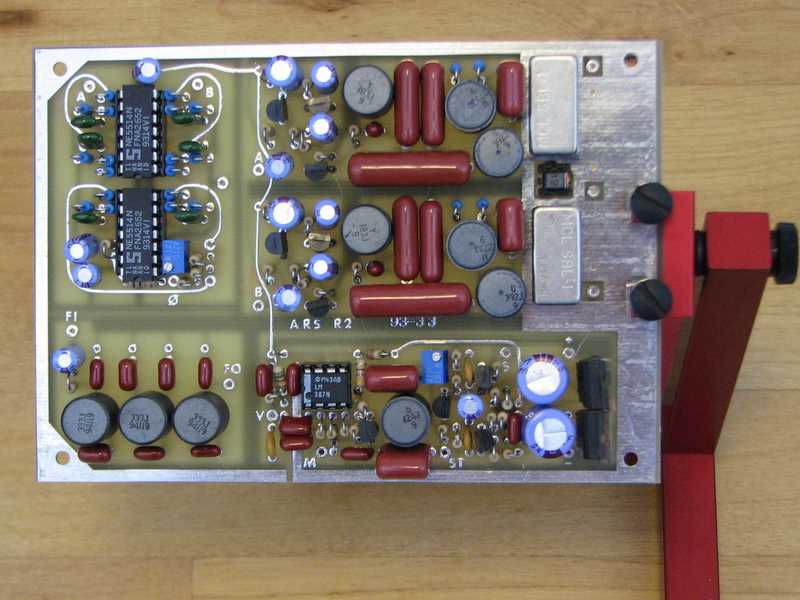
KK7B R2 receiver, top side

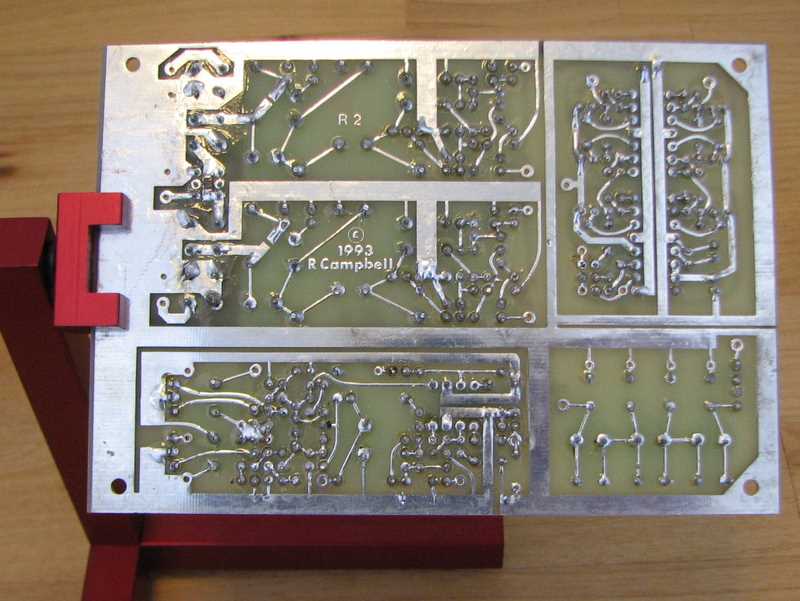
The target of my soldering was my KK7B R2 receiver kit. This is the companion to the T2 I wrote about a few weeks ago. To my surprise, the R2 was easier to put together despite the higher part count. The components are larger, forcing a less dense pin matrix, and the board is separated into sections: mixers and diplexers, audio phase shift, low-pass filter, and audio amplifier. Conveniently, the board uses jumper wires (not yet installed on mine) to connect the sections. The intent appears to have been to make it easier to extend the board by swapping in a different phase shift network or adding alternate filters for CW or contesting, but it will make the board easier to debug as well, since I can bring it up a section at a time.

Keep in mind that this is a vintage kit that is no longer available, but updated versions of the design are still produced by Kanga US.

The board surprised me with its heft. I work mostly with surface-mount digital boards where the fiberglass PCB is the heaviest component. This board, though, weighs 134 g (4.7 oz), which is a lot for 100 cm2 (16 in2). The shielded inductors are the culprits. Each black cylinder in the photo is the ferrite shield of an inductor. Each inductor is noticeably heavy for its size, and this board has 10 of them.

KK7B R2 receiver board, bottom side

Once I wash the flux off (it’s not as much fun as soldering), the next piece of the puzzle is to build or buy a VFO. Rick, KK7B, designed a companion VFO for these boards, but it is out of production at the moment. I’m thinking about one of the Si570 VFOs out there. This little chip offers a very low phase noise synthesizer with tuning in steps of a fraction of a Hertz. Having this on a single chip was a pipe dream when the R2 and T2 were designed.

After that, I’ll need to build a power amplifier to boost the T2’s milliwatts up to a reasonable level — at least a watt, maybe as much as 50 W. Finally, I will have to integrate all the pieces into a working rig. Professionally, I do a lot of microcontroller work, so it’s tempting to build a fancy digital control panel with circuitry to integrate every R2 and T2 option imaginable. Instead, I’m trying to keep myself to something simple: one band, SSB only, and a digital frequency readout as the only frill.

I still have to pick the initial band. I’m torn between 20m, my favorite for PSK31, and 40m, which I like for SSB. I’m after whatever DX I can land in either mode. What band would you recommend?